Tuesday, December 6, 2011

Cookies and Cream Popcorn


It has been quite some time since I have posted... again... and I have finally found a recipe that I feel might be what I needed to break my non-posting slump.  Yes, friends, it was so intriguing that as soon as I saw the recipe online while simultaneously eating lunch/checking email/catching up on my Google reader feeds I printed it out and stopped at the grocery store on the way home from work.  Which, by the way is not something that I usually do when it is raining...there is something about all those wet plastic bags that bothers me (yes, I use plastic bags...it keeps me from paying for them to be used as trash bags...so don't judge me!)

Anyway, the recipe is for Cookies and Cream Popcorn!  Now you may think that is really not your thing, but trust me it is excellent!  After making this batch, I found that I could not stop snacking on it and finally had to package it up so that I did not eat the entire pan.  What I like about this snack is that it is super quick and easy to make, as well as it has all the things that are great about a snack: sweet, salty, crunchy and doesn't leave your hands all messy when you are finished (good for sneaking a handful without getting caught!).

So here is the recipe that was inspirational enough to get me to brave my super slow internet to attempt a post...with pictures!


This is from before I realized what a mess it was trying to chop these by hand on a small cutting board!


Cookies and Cream Popcorn
modified slightly from Handle the Heat

1 bag of microwave popcorn (the home style kind, not the super buttery kind)
12 chocolate cookies with cream filling, aka. Oreos, chopped up
6 oz. of white chocolate chopped (or half a 12 oz. bag of white choco. chips)


  • Pop the microwave popcorn.  I use the popcorn setting on my microwave, or just follow the directions on the package.  Allow this to cool while you are getting everything else ready.  
  • Cover a baking sheet with non-stick foil or parchment paper.
  • Chop the chocolate cookies into pieces about the size of a cheerio.  I ended up throwing mine in the food processor and pulsing, just don't over process them or you will end up with crumbs. 
  • In a microwave proof bowl, melt the chips in 30 second intervals, stirring in between, until melted.
  • Put cookies and popcorn in a large bowl and mix gently.  Add about half the melted chips and then stir a bit so that you bring the un-coated popcorn to the top.  Then add the remainder of the melted chips and stir until all of the popcorn/cookie mix is coated.  Spread the mix over the foil covered pan and allow to cool until the chocolate has hardened.  Gently break apart into the desired size and put in sealed bags or containers.  This will keep similarly to caramel corn, don't refrigerate or it will get soggy.
This is a great take-a-long for parties or as holiday gifts!

Sunday, October 23, 2011

French Macarons


While it feels like the spring is always a busy time... I forget how crazy things can be in the fall as well. That said I have been a total slacker with the blog and am now going to try and be better about posting, especially with the holidays coming up. And by holidays... I mean Halloween of course! I just got the cutest mini cookie cutters that are Halloween themed, must do something cool with them!

Fall craziness aside, I did take a week where I tried to master the French Macaron (this does not have coconut) and when I say "master" I mean try two batches before getting tired of spending all my money on sugar and egg whites. But really, I wanted to try this out because I wanted to be able to give a fabulous cookie to my friend who has a gluten allergy and these are gluten free cookies (they are made with almond flour, and no it is not available in the store, you have to grind them up yourself!). So while I am sharing pictures, just know that this is my first attempt, which actually went much better than my second (Martha's recipe was awful...gasp!).

I found the most success with the recipe from David Lebovitz's book The Sweet Life in Paris which is by the way an excellent read. The recipe was easy to follow, however I was only able to get one batch to come out of the oven successfully. I need to mess more with the temperature and the time. I did not follow the time exactly in the recipe, but I will post more about it when I can get it right. For now though, here are the pictures of my first attempt at Macrons. They truly are worth the effort. There is something about the crispy outside and the soft cream filling that is like no other cookie I have ever had!

David Lebovitz's French Chocolate Macaron Recipe


Monday, September 19, 2011

Raw Apple Cake with Salted Caramel Sauce


The fall is probably my favorite season of the year. The air is fresh and crisp and there are lots of different things to bake with. Plus it is cool enough to finally want to bake again after those hot summer months. I started off this cool weather snap with using some of the apples I picked up at the farmer's market. I used a recipe that my dad used to use when I was little to make the healthiest apple cake I have ever come across. The cake uses all whole wheat flour which is not often done because it normally will make a VERY dry cake. However with all of the apples, there is no way that this cake could ever be dry. I added the salted caramel sauce once the cake had cooled and it resulted in a great combination with the apples, almost like a camel apple in a cake!


Raw Apple Cake

1/4 c. brown sugar
2 eggs
1/2 c. oil
1 tsp. vanilla
3 c. peeled and chopped apples (I tend to use more like 5 cups...I like lots of apples!)
1 3/4 c. whole wheat flour
1 tbs. ground flax seed
1 tbs. wheat bran
1/2 tsp. salt
1 tsp. baking soda
1/2 tsp. cinnamon
1/2 tsp. nutmeg

Preheat oven to 350 degrees.

Beat together the sugar and the eggs in a large mixing bowl. Beat in the oil and vanilla. Stir in the apples until covered. Mix the flour, flax seed, wheat bran, salt, baking soda, cinnamon and nutmeg in a separate bowl. Fold the dry ingredients into the apple mixture. Pour into an oiled and floured 9 inch square baking pan. You can also use two 8 inch round cake pans. I also just greased the pan and then lined the bottom of the pan with parchment.

If using a 9 inch pan, bake for 45 minutes. If using two round pans, bake for 35-40 minutes.

For the salted caramel sauce from Cara Lee Cupcakes and Cake, I used a recipe that I have posted before and it has yet to let me down!

I originally wanted to make this a two layer cake with a caramel filling, however it is probably too moist to do that. Plus I was out of cream to make the sauce and wanted to cut into the cake and it never looks good when a chunk is already cut out of the top layer!

Sunday, September 11, 2011

Today We Remember

Things have been extremely busy and I have been a slacker with posting, as well as I am having issues with my internet and just need a faster connection since it has become a real pain to upload pictures. Today, however I wanted to share something that I though could speak my sentiments better than I could. When I was in college I went to NYC and hear His Holiness the Dalai Lama speak in Central Park. After waiting almost all day, we finally heard his words of peace and kindness, something we could use more of in this world. He has an amazingly calming presence and really does smile a lot. So here are his words of peace as we remember on the 10th anniversary of September 11th.

"Today, as we mark the tenth anniversary of the September 11th 2001 attacks on New York and Washington DC, let us remember all the innocent lives lost and ponder the continuing impact of that tragic day. September 11th reminds us of the horror we human beings can unleash on ourselves when we allow our human intelligence and powerful technology to be overtaken by hatred.

We need to learn from our painful memories of September 11th and become more aware of the destructive consequences that arise when we give in to feelings of hatred. This tragedy in particular has reinforced my belief that fostering a spirit of peaceful co-existence and mutual understanding among the world’s peoples and faith traditions is an urgent matter of importance to us all. We must therefore make every effort to ensure that our various faith traditions contribute to build a more caring, peaceful world."

The Dalai Lama
September 9, 2011

Originally published in the Washington Post on September 10, 2011.
Online Link

Saturday, August 27, 2011

Lemon Chicken Noodle Soup

I am borrowing from Panera Bread with this soup recipe...kind of. I was there for lunch a week or two ago and loved the combination of the light lemon and the savory chicken broth. I thought...I can make that, and I was able to re-create it at home with stuff that I already had on hand. I often just throw things together and somehow they end up tasting good. This is a trait that I inherited from my mom, but my sisters somehow did not manage this knack for throwing things together. So at their encouragement, I am trying to be better about writing down what I add to the pot and have measurements to create a recipe that others could follow. So here is my re-creation of a great soup I had at lunch out.

Lemon Chicken Noodle Soup

1/2 c. small pasta like orzo, cooked
1 clove garlic finely chopped
1 tbs. parsley
1/4 tsp. celery seed
Zest and juice of 1 lemon
Broth from Steamed Chicken (see below)
1 1/2 c. chopped Steamed Chicken
1/2 lb chopped spinach (I used a bundle of fresh Swiss Chard from the Farmers Market)

Put the chicken stock in a pot and place over medium heat. Add the garlic, lemon zest and juice, parsley, celery seed and salt and pepper to the stock and bring to a boil. Add the chopped spinach or chard and let cook until bright green in color. Then add the chicken and pre-cooked pasta. Simmer over low heat for 10-15 minutes and serve hot.

Steamed Chicken

Chicken breasts with the bone, but no skin
1 onion quartered

In a soup pot place the chicken and onion, then cover the chicken with water so that it has a 1/2 of water covering it. Remove the chicken from the pot and bring it to a boil. Add the chicken back into the boiling water and boil for 3 minutes. Cover with a lid and remove the pot from the stove. Allow the chicken to sit covered for 3 hours then either refrigerate or use. Remove chicken and chop for soup or chicken salad, use the broth for soup.

Thursday, August 18, 2011

The Cupcake Marathon

Today begins the great cupcake marathon! I will start by saying that I am NOT a professional baker and have a very modest kitchen which I use to cook and bake for friends and family. And for a co-worker, I am making 100 cupcakes for her wedding. This is the first time that I am baking anything of this quantity (maybe with the exception of Christmas cookies). I am planning on making this a two day experience with the baking today and icing tomorrow, right before the bride comes to pick them up. I will continue to update this post as the day goes on, so check back for more on the day of baking.

Round 1 - Chocolate with peanut butter icing

8:20 - The AC is on and I am ready to get started. I have all of my supplies together and I am starting off with the cake that is my favorite to make. It is also the one that will stay moist the longest. Yes, I am using the Best Ever Chocolate Cake recipe and expecting to end up with lots of cake, since this recipe makes the most batter. I am also using the Peanut Butter Frosting recipe from when I made the PB&J cupcakes.

Round 2 - Vanilla with vanilla butter cream

10:28 - It is definitely heating up in my kitchen. The chocolate cakes are finished with enough extra batter to make a small grooms cake as a surprise. I have the batter ready for the vanilla cakes and have a good system going so that the oven is never empty.

Round 3 - Strawberry cake with strawberry icing

11:00 - The batter is started and the vanilla cakes are baking. I think it might be time to turn the AC down! I am officially out of eggs, milk and close to being there on the flour. I think I might have to take a baking break and hit up the grocery store for staples. This is gone much more smoothly that I expected and so far I am happy with the results. But there is more to come...

Wish me luck and cloud cover so it doesn't get too hot in the house and kill my AC unit!

Thursday, August 11, 2011

Blueberry Lemon Muffins


One of the things that I enjoy about the summer is fresh blueberries. Why yes, I also love the beach, but come on people...when it comes down to it summer is the best not only for the sun, but also for the food! Garden ripe tomatoes, juicy peaches, crisp corn on the cob, sweet melon and tangy blueberries that burst in your mouth when you bite down. It makes me happy just thinking about it!

So when I stopped at a local farm stand on the way home from work and they had boxes of fresh blueberries that were the size of your thumb, I couldn't resist...well those and the peaches and tomatoes. I couldn't help myself and popped a few berries in my mouth on the way home and they were wonderfully sweet with that tangy berry flavor that you get from fresh berries, not bitter or tart like you sometimes find from ones in the store, picked before they are truly ripe and then refrigerated.

Being that I had about two cups of fresh berries, I started by eating a good half cup then decided to use the rest to borrow an idea that I saw in a Martha magazine. I decided to use my old Betty Crocker cook book circa 1969 since she has never steered me wrong. I found a basic muffin recipe and adapted it to create a delicious blueberry muffin with hints of lemon.

I couldn't resist eating one right out of the pan and it was worth not waiting! The top was crispy and dotted with bits of decorating sugar that I had added before popping them in the oven. The inside was striped with the indigo of burst berries and had an underlying hint of lemon. These would be great with a streussel topping or plain as I had them with a bit of butter. This was a fabulous finish to my day, yes I had muffins for dessert and they were wonderful, I hope I leave some for breakfast!


Blueberry Lemon Muffins
Adapted from Betty Crocker Cookbook

Makes 12 muffins or 8 small loaves
Preheat oven to 400 degrees

1 egg
3/4 cup milk
1/2 cup vegetable oil
3 tablespoons lemon juice (or juice from lemon that was zested)
zest from one lemon
2 cups all-purpose flour
1/2 cup sugar
3 teaspoons baking powder
1 teaspoon salt
1 cup fresh blueberries (if using frozen be sure that they are thawed and well drained)

Grease the bottoms of 12 muffin cups. Beat the egg then stir in the milk, oil, lemon zest and lemon juice. Add the remainder of the dry ingredients to the wet and blend slightly, reserving a table spoon of flour to mix in with the blueberries to coat them. This will prevent them from sinking to the bottom of the batter in the muffin cups. After coating the berries add them to the slightly blended batter and gently incorporate the berries only until the flour is moistened. Over mixing can make the muffins dense or tough, it is okay to have a few lumps or bumps in your batter.

Bake 20 minutes. Tops should be golden brown.


Friday, August 5, 2011

Peanut Butter and Jelly Cupcakes


I do not like peanut butter. I know...it seems criminal, however I just do not care for peanut butter in things. I will eat it on an apple, with carrots, or with honey on toast, but in things like ice cream, cake, candy, etc. I am not a fan. So when I was asked by a friend to make chocolate cupcakes with peanut butter icing, I was at a loss. How do you try out something that you don't really like?

I ended up making PB&J Cupcakes because I had a vanilla recipe I wanted to try and so had cupcakes already on hand. I didn't think that just plain cake and peanut butter icing would be so good alone so I decided to add some flavor by filling the cakes with blackberry jelly. The end result was pretty good. I did try one and liked the flavors together. The icing recipe I got from Cara at Cara Lee Cupcakes and Cake was excellent and I will be using it for the cupcakes that I am making for my friend's wedding. The vanilla cake recipe was pretty good too. It was light and fluffy with good vanilla flavor and stayed fairly moist the next day. I am not sure if it is the best vanilla cake recipe I have found, but it is easy to make and better than others I have tried.

The cake recipe came from Ruth Reichl's book Garlic and Sapphires. It was a great read, not a cook book, but a narrative of her years as a food critic for the New York Times. It was very entertaining as she described the different disguises she would use to avoid being recognized. There are recipes interspersed in the chapters that meld well with each story she tells.

PB&J Cupcakes

Vanilla Cake
Slightly Adapted from
Nicky's Vanilla Cake
Garlic and Sapphires by Ruth Reichl

2 sticks unsalted butter at room temperature
1 cup sugar
3 eggs
2 cups flour
1 teaspoon baking soda
2 teaspoons baking powder
1 teaspoon salt
1 cup sour cream
2 tablespoons vanilla extract

Makes approximately 18 cupcakes.
Preheat oven to 350 degrees. Put papers in cup cake pan.

Mix butter and sugar in a mixer until smooth and fluffy. Add eggs one at a time and mix well after each addition.

Combine the flour, baking soda, baking powder and salt in a seperate bowl. Mix well then add to the butter and sugar bowl. Mix well. Add the sour cream and mix until combined. Add the vanilla and stir until blended.

Using a medium cookie scoop fill cupcake liners with batter or use a spoon and fill until 2/3 full. The batter is thick so the cookie scoop works well.

Bake in the oven for 14 minutes. Do not over bake or they will get dry!

Using a paring knife or small sharp knife, cut a small circle into the center of the cupcake and remove the chunk of cake. This will be similar to coring a tomato. You want enough cake cut out to create a small well for the jelly. Don't take out too much or the cake won't hold up.

Fill the depression with your choice of jelly. I used blackberry because that is what I had on hand. Also it helps to mix the jelly in a small bowl first so that it is not chunky. Use a teaspoon to fill the cake.


Peanut Butter Icing
Slightly Adapted from Cara Lee Cupcakes and Cake

1 stick of unsalted butter at room temperature
1/2 block of cream cheese at room temperature
3 tablespoons of creamy peanut butter (I used pretty heaping tablespoons)
1/2 teaspoon of vanilla
2 cups of powdered sugar (Add a bit more if you want a slightly thicker frosting)

Cream butter, cream cheese and peanut butter in mixer until well blended and smooth. Be sure to scrape down the sides. Add the vanilla and mix until incorporated. Add the powdered sugar one cup at a time, blending well after each addition and scraping the sides as you go.

At room temperature, pipe onto cupcakes. The frosting can be refrigerated, but let it come to room temperature before using.


I gave these to my neighbor, who has two little boys. They were quite happy to get cupcakes with pirate wrappers!

Sunday, July 24, 2011

Beat the Heat with a Cool Summer Salad

It. Is. So. Hot. Really all I want to do is sit in a pool or maybe in front of an air conditioner and read. It is too hot for baking of any kind! Oh how I dream of a cool fall evening that is just begging for me to turn on the oven and slip in a nice apple pie, baked squash or cookies, but alas, there is no such evening in the near future. So in the mean time, while I dream of using my oven, I must be satisfied with using the delicious veggies that are coming out of the garden and relishing in the heat. Yes, I know, those tomatoes would not taste nearly as good if it wasn't for the heat, so I am enjoying the bounty of the earth on wheat bread with mayo, salt and pepper for a good old MD tomato sandwich.

Another summer favorite that is light and refreshing as well as healthy is a Mediterranean Cucumber Salad that I made when my friend Steph came to visit. We found this easy salad the perfect way to cool down. The cucumbers are crunchy and the olives add a great salty flavor. You can whip this up in minutes!

Mediterranean Cucumber Salad

1 lg or 2 small cucumbers chopped into bite sized chunks
2 cups of cherry tomatoes halved
1 cup Kalamata olives
1 cup of Feta cheese crumbled
1/4 cup olive oil
2 tbs. red wine vinegar
salt and pepper to taste

Mix together all of the ingredients in a bowl and serve cold. Stay cool!

Friday, July 15, 2011

Crab Bruschetta


Being from Maryland, there is little that we will not add crab meat to. My new summer favorite is Crab Bruschetta. It is great to take to picnics or for a summer BBQ because it uses seasonal ingredients. I have made it several times this summer already.

It is also good added to pasta or on an English muffin with melted cheese as a melt. I am sure it would also be great in other ways. Let me know how else you may use this versatile appetizer.

Crab Bruschetta

1-2 Large tomatoes diced (Beefsteak work well) or 1 lg can of Petite dices tomatoes
3-4 Leaves of fresh Basil or 1/4 - 1/2 tsp/ dried Basil
1 or 1/2 clove Garlic grated or finely chopped (the garlic gets stronger the longer it sits, so sometimes less is more)
1 tbs. olive oil
The meat of 2 or more picked crabs or 1 can crab meat
Salt and Pepper to taste

First put the chopped basil and grated or chopped garlic into a non-metallic bowl with the olive oil. Let that sit for a bit so the oil becomes infused with the flavors. Then add the chopped tomatoes and salt and pepper. Mix these together. Add the crab LAST because as you mix it will break up the meat. Gently fold in the crab meat and serve over toasted bread.

It is good right away, but better the second day because the flavors become stronger.

Tuesday, July 12, 2011

Chocolate Chip Cookies and Salted Caramel Sauce


One of my earliest memories of baking is making chocolate chip cookies with my dad. He was always the baker in our house growing up and he is still an expert cookie maker. I can remember standing at the counter watching him cream the butter and sugar together with a pastry cutter. To me it never seemed like a planned thing to make cookies. We would take the butter out and start, no waiting for it to come to room temperature. And, there were always chocolate chips in the pantry. I couldn't tell you where or when they were purchased, but they were just always there like a favorite stuffed animal. And maybe that is what chocolate chip cookies have become for me, a comfort food like no other, not only because of the salty, chewy, and sweet flavors, but because of the comfort of making them with family. Now as an adult, I always have chocolate chips in my pantry, just in case I need them.


It is my father's birthday today, so I have made chocolate chip cookies and will be dropping them off at his work this afternoon to surprise him. I used the recipe on the back of the Tollhouse chip bag. That is the one we always have used, and I follow it exactly. That recipe, hands down makes the best chocolate chip cookies. My only piece of advice is to bake them for the minimum amount of time listed on the package (usually 9 minutes).

As an aside, this recipe also always makes me think of the Friends episode when Phoebe tries to remember the recipe that her grandmother used to make chocolate chip cookies. Monica then makes about 100 batches of cookies to try and get it right, only to find that it was the recipe from the back of the Nestle chip bag that she used.


The other thing that I made was a Salted Caramel Sauce. My dad is a huge fan of ice cream, salt and caramel. I thought what would be better than a jar of homemade salted caramel to go over his ice cream. I used a recipe from Cara at Cara Lee Cupcakes and Cake. The recipe was super easy to follow and the sauce turned out delicious!


HAPPY BIRTHDAY DAD!

Wednesday, July 6, 2011

Pear Ginger Maple Pie


I got back from the beach yesterday and thoroughly enjoyed my weekend free from technology. Just me, the sun, and lots of sunblock! The downside to this trip is that when I returned, the roofers were still hammering away and the gutters still have to go up. So much for wishful thinking that it would all be done by the time I got home.

And, to be even more of a Debbie Downer, I was trying to bring my plants back to life, by giving then a thorough soaking and I stepped on a nail! Yes, one of the nails that has been flung into my yard by said roofers. Needless to say to be on the safe side, I cleaned up my foot and hauled it to Target to get a Tetanus shot (really, what can Target NOT do?) Now that I have averted potential lock jaw, I feel better, but I am not sure what hurts worse, the shot site or nail wound!

I also returned to find I had missed the Pie Party! So despite my late submission, I am still posting about pie (cause pie makes everything better) and sharing a recipe that I got from my neighbor, who is also quite skilled in the kitchen. I love when she pops over to share something that she has whipped up! This time she shared a slice of Pear Ginger Maple Pie. I quickly requested the recipe which she shared, notes and all! The original recipe is from food blogger Garrett McCord of Vanilla Garlic.


Pear Ginger Maple Pie Recipe
from Simply Recipes via Garrett McCord

INGREDIENTS
•1 recipe dough for pate brisee pie crust (or use frozen crust)(I went with frozen)
•6 cups of peeled and roughly chopped pears (use Bosc or Bartlett)(Red Danjou work too)
•1 ½ tablespoons of cornstarch
•1/2 teaspoon of salt
•1/4 cup of packed brown sugar
•1/4 cup of pure maple syrup
•1 tablespoon of lemon juice
•1 teaspoon of lemon zest
•2 tablespoons of chopped candied ginger (or 1/2 teaspoon of ground ginger)

Oatmeal Crumb Topping Ingredients
•2/3 cup of flour
•1/2 cups of old-fashioned oats
•1/2 cup of packed brown sugar
•1/4 teaspoon of salt
•1/3 cup of cold, unsalted butter, cut into 1/4-inch pieces

METHOD
1 Roll out pie dough and place in a 9 1/2-inch deep-dish pie dish and place in the freezer to set. (A 9 inch works fine too)
2 Preheat the oven to 400 F. Place the chopped pears in a large bowl with the cornstarch, candied ginger, brown sugar, maple syrup, lemon juice, and lemon zest. Toss well.
3 Place the pear mixture into the chilled, crust lined pie dish and smooth the top of the fruit. Place the pie into the center oven rack and bake for 45 minutes. (Put a baking sheet on the rack under the pie to catch any drippings.) After 30 minutes, line the edges of the pie with foil or a pie protector to prevent them from burning.


4 While baking take all the Oatmeal Crumb Topping ingredients and place them in a bowl. Use your hands and mix the ingredients until large crumbs form. Refrigerate until use.


5 After 45 minutes reduce heat to 375F. Remove the pie and carefully place the crumb topping over the pie, covering all the fruit. Bake for another 15 minutes. Cool on a wire rack for at least one hour. Serve.


Yum!
I am not nearly finished on the topic of pie as it is a part of my family food history!

Wednesday, June 29, 2011

Panna Cotta with Homemade Strawberry Syrup


I saw a picture of this on Handle the Heat and decided that I had to try it because it just looked so pretty. For those of you who are unfamiliar with Panna Cotta here is some background, but it is basically an Italian dessert with cream, sugar and gelatin. As much as this sounds like it is just creamy jello, it is much more than that. Being someone who can not stand any kind of whipped cream or cool whip with her jello, this is a delicious combination of creamy, sweet and firm, similar to a custard.

It was incredibly easy to make and kept well in the fridge. The tough part was getting it out of the cup smoothly, it definitely has to be sprayed well with cooking spray so that it comes out easier. I would also suggest halving the recipe since it made way more than I could eat. I also used some homemade strawberry syrup that I had canned in May when the berries were coming in. I liked the taste and texture of the whole berries and the cream together.

Panna Cotta Recipe from Handle the Heat

Friday, June 24, 2011

Best Chocolate Cake EVER

I have found the recipe for the best chocolate cake EVER, and I really do mean to capitalize "ever". I found the recipe on Desserts for Breakfast, a great food blog, and followed the recipe exactly. The cake was rich and chocolaty without being too sweet. I mean there are almost 8oz. of chocolate alone in the icing!

I would post pictures, however I am going to just let you rely on the images from where I got the recipe. I didn't finish putting it all together until 9pm and by then it was too dark to get the natural light I needed for a good pic, but trust me, mine looked just like the pics on the blog. The icing was shiny and smooth while the cake was dark and very moist.

Here are a few warnings/tips if you make this cake, which I highly suggest! First, the icing really does need to stay cold/cool to spread and actually stay on the cake. I stuck mine in the fridge to cool down, but not to the point that it was solid. You should still be able to stir it and it should look shiny.
I made the mistake of letting the cake sit in the car on my way home from work while I ran into the store to grab more flour and sugar (I ran out... imagine that!). In the heat, the icing ran down the sides of the cake and ended up pooling on the plate.

Second, I used two 9" round pans and it just barely fit. I was lucky that it did not run over into the oven, but I would probably do the same again. I also only cooked it for the minimum amount of time listed... since my oven is finicky.

Third, I lined the bottom of the pan with parchment instead of flouring it (which I hate to do) and it came out just fine.

Really, give this cake a try...you just might cry it is so good!

Wednesday, June 22, 2011

Family Reunion and Berry Trifle

This past Sunday was spent getting together for our annual family reunion. It was wonderful to see everyone and spend time outside by the pool. It was an even better surprise to see my sister Emma, who showed up unannounced from Ithaca! She is fabulously talented and always busy with work, so it was nice to be able to catch up with her and her boyfriend.

One of the best parts of the reunion of course is the food. When I was much younger the family would get together at a park and there would be rows and rows of food, but also many more people. Now that everyone is much more spread out, we just get together at a cousin's house to play frisbee golf, swim and of course eat good food.

My mom offered me the job of cooking/ preparing the food for the day and I was glad to take her up on that offer. So I ended up making the mini caprese salad, a berry trifle, and Mediterranean pasta salad.

The berry trifle was a huge hit so here is the recipe. I found this by searching online for a trifle recipe, however I do not really follow the recipe, I really just needed some ideas. So this is my variation on what I found.

Berry Trifle

1 box vanilla pudding
1 orange
1 c. milk
1 c. sour cream
2 c. whipped topping (or whipped cream)
3 c. blue berries (I just buy 2 boxes at the store, or use as many as will fit in the dish)
2 c. strawberries sliced
1 pound cake (you could also use angel food cake and other "light" ingredients to make it low fat and low calorie)

Mix milk, sour cream and pudding together in a bowl until blended. Then zest (use a small grater to shave off the skin of the orange, but not the white part) the orange and mix into the pudding. Cut the orange in half and squeeze the juice into the bowl. I do this over my hand to catch any seeds. Mix well. Finally fold in the 2 cups of whipped topping and place in the fridge.

Wash berries and slice strawberries. Slice the pound cake into small cubes about 1 inch by 1 inch.

Place sliced strawberries around the base of a clear glass trifle bowl or other tall dish. Cover the bottom with a single layer of cake. Next top with 1/3 of the cream mix. Then add a layer of blueberries, cake and 1/3 cream. Next is a layer of the sliced strawberries, cake and cream. That will take me to the top of the bowl. Sometimes I have to mix in the rest of the whipped topping with the last 1/3 of the cream mix to have enough to cover the cake. Finally top with a layer of blueberries. Feel free to vary the layers as you see fit. The first time I made this (see pic above) I was not able to get as many layers in the bowl because I used too much cake.

Monday, June 20, 2011

Eggs in a Basket with Creamed Spinach


I love going into the fridge and coming up with a new twist on an old favorite using what I already have available. So this morning when I was craving something hearty and healthy I decided to make Eggs in a Basket topped with some shredded Gruyere cheese and Creamed spinach. It turned out delicious and was the perfect combination of salty, creamy, and crunchy.

Eggs in a Basket with Creamed Spinach

1 slice of bread
1 egg
1 tsp. olive oil
salt and pepper to taste
fist full of spinach leaves
2 tbs. cream
1/4 c. shredded Gruyere cheese (approximate amount; you can also use swiss cheese)

Cut a hole in the middle of the bread slice (I use a 1/3 measuring cup to do it).

Heat pan on medium, add olive oil to coat bottom of the pan. When hot, place bread in pan, slide it around a bit to coat with oil then flip and do that to the other side. This will coat both sides with oil so the bread doesn't stick.
Crack egg into the hole in the bread. You can break the yolk or leave it as is depending on how you like your eggs.
Then add salt and pepper to taste. Cook on that side until the bread is browned and the egg and bread slide easily around the pan.
Very carefully flip the slice of bread and egg. Allow to cook until bread is browned. If you want the yolk more done, then reduce the heat so that it doesn't cook at quickly.
Shred the cheese over top of the egg and bread while it is in the pan.
When done, place bread on a plate. Add a bit more oil to the pan and add the spinach. I don't chop the spinach. As it starts to wilt, add the cream and some more salt and pepper. Stir it around in the pan until all the spinach is cooked. The cream might boil a bit, that is okay since it will reduce the liquid. Place ontop of the egg and bread.

Tuesday, June 14, 2011

Food Swapping

I am a frequent reader of the fabulous food blog Eat the Love, by Irvin. It is his blog that made me aware of the food blogging community and got me started with my own blog. It is so nice to know that I am not alone in my obsession with food!

I recently read his posting about food swapping... and I was completely in love with the concept! The only places that I found online that do this are Brooklyn and possibly DC. I so badly want to try this... any takers?

Sunday, June 12, 2011

Mini Caprese Salad


Berry Trifle with Orange Cream, Mini Caprese Salads and Chocolate Covered Strawberries (all chocolate dipping was done by a co-worker and so I unfortunately can't take credit for the beautiful platter on the end pic!)

I recently hosted a happy hour for my department for two fabulous women who are retiring. I enjoy hosting as it gives me an excuse to beak out my nice dishes and really give my house a good cleaning. As I was racking my brain for something light and healthy, but also a finger food (two things that don't always go together) when I came across a great idea from Barbara Bakes. She put the mini salad on an entire skewer, but I was looking for something a bit more compact than that. So I decided why not use a toothpick. I bought a container of the mini mozzarella balls, cherry tomatoes and fresh basil. I stacked a tomato, piece of basil leaf and then a motz ball. They ended up fitting perfectly. I finished with just a sprinkle of salt and pepper. They were a huge hit!

Saturday, June 4, 2011

Pasta a la Leftovers


Let me start by saying that growing up we learned to be very creative in the kitchen. When I would go to a friends house and we would get a snack, I was always amazed at the quantity of food in their fridge. It was not like that at my house. Not that we never had a packed fridge, just that more often than not, it was full of very random things or very little at all. So my sisters and I have basically learned how to create something from just about nothing, or remix leftovers into something completely different.

The best way to do the remix dinner is to start with pasta, something that was always lurking in the back of the pantry. In the summer we could always rely on veggies from the garden to create something delicious.

This evening I did some scrounging in my fridge to put together a tasty dinner since I was just back from a weekend away and the pickings were slim.

Here is what I was able to come up with:
1 zucchini
1/2 a jar of homemade bruschetta (tomatoes, garlic, onion, dried basil)
A sprinkle of fire roasted dried tomato bits
Parmesan Cheese
Pasta

Everything except for the pasta and parm went into the pan to cook with a bit of olive oil.

I boiled my new fun shaped pasta from Marshall's (they carry the best random food items to cook with). By the time the zucchini was cooked through, but NOT mushy (nothing worse than mushy veggies!) the bruschetta had cooked down to create a thick-ish sauce. I placed that over the drained pasta and topped it with some grated parm cheese and it was tasty, quick and very easy.

Thursday, June 2, 2011

Thank You Apple Pie


I was fortunate enough to be able to spend my Memorial Day weekend at the Beach! While it was perfect beach weather, my sister and I were not there just to enjoy the rays, but to also get the beach house in working order for the summer, yard work and some serious cleaning! Needless to say the beach was calling to us and so we were very efficient in our house work.

The weather and beach were fabulous and though it is still not officially summer yet, it sure feels like it now, I don't want to go back to work! But before I get to the food, a word of warning...don't ever use sunblock from the previous summer! Just go out and but a new bottle! I am speaking from a painful experience here. I used a new bottle of the spray stuff on Saturday and came home with a nice tan, but Sunday was a disaster! I used a bottle from last year and slathered the stuff on thinking I would be good to go. Not the case! I ended up cooked anywhere that the sun had not previously been exposed to. So at this point I am sporting a 28 year old Coppertone baby tan line!

Now for the food.

We are fortunate enough to have some fabulous neighbors at the beach who have been mowing the lawn for us since we are not able to get down there regularly. So I was thinking what better way to say "thank you" than to bake something. I was trying to decide what to bake and went back and forth between chocolate chip cookies, muffins, or an apple pie. My decision was made when our Friday "snack" at school had a bunch of extra apples. I took those home with me and carted them "down the ocean" to bake.

This pie was not anything special, I took the short cut with the crust and just used a store bought one, but it was made with lots of thanks in mind. It turned out beautiful and our neighbor Mike said it was great.

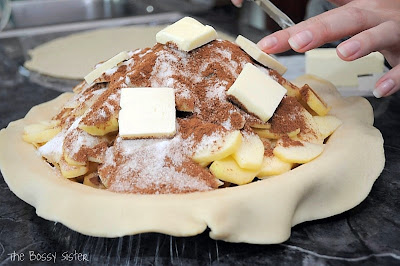
Basic Apple Pie
Preheat the oven to 375 F.
8-10 apples (depending on the size you may need more or less, you want enough that the fruit is about 3-4 inches above the edge of the pie pan)
3/4 cup sugar
1-2 tbs. cinnamon
4 tbs. butter
2 store bought pie crust (I will include a recipe for a easy pat-in-pan pie crust soon)

Peel, core and slice all of the apples.

Place the bottom crust in the 8 or 9 inch pie pan. Let the edges of the crust hang over the edges, do not trim them off. Place sliced apples in the crust.

Sprinkle the sugar over the apples evenly.

Do the same with the cinnamon. Then slice the butter and place pats of butter over the cinnamon evenly around the pie.

Now place the second crust over the pie. Use your fingers to roll the bottom crust and top crust together toward the edge of the pie plate so that you are creating a seal between the top and bottom crust. You can then use your thumb and forefingers to create a pinched edge around the pie.

The last step is to cut vents into the top of the crust. Use a sharp knife to cut 4-5 lines in the top crust. This will let the steam out while the apples are cooking and allow the crust to settle with the apples as they cook.


Besides peeling all of the apples by hand, this is a pretty quick and easy way to make a fabulous pie. It is also good to add a few Crasins, raisins or even chopped dried apricots to the sliced apples to give the pie a unique flavor.

Thanks to my lil sis for taking the pics this time. Much easier to have a photographer than balance dirty hands and a camera!

Finished!

Wednesday, May 25, 2011

Addressing the Cake Pop Trend Part 2

So now that I have provided the ingredients for my Cake Pops, here is the process for making them.

I made chocolate cake (from a box) and used 2/3 of a can of chocolate frosting to make chocolate pops then coated them with a white or "vanilla" candy melt coating and red drizzles.

I started out by taking the cold cake and using my hands, broke it up until it was entirely in crumbs. You could use a food processor for this part, but hands were less to clean up. Be sure that there are no large clumps of cake or the balls won't form evenly (immature laugh).

Then add half the can of icing and use a spoon to mix it all together. It will start to stick together and depending on how moist your cake is, you may want to add more. You do not, however want it to become too sticky by adding too much icing because then it will be hard to work with.

Mine was almost forming a ball and was no longer in a crumbly form.

I then used a cookie scoop (1 1/2 Tbs) to measure out even sized balls, which I then split in half to that they were not too large for the pop sticks.

After they were split in half, I then used my hands to form the balls (about the size for two bites) and placed them back in the 13x9 pan that I baked the cake in. They almost all fit back in there (about four had to be stacked on top).

I placed them back in the fridge over night because I did not have time to make them at that time, however you would still need to chill them after handling because if they get too soft they are hard to dip.

The next step was to melt the candy following the directions on the package. The most helpful tip I have learned is to be sure not to over heat the candy or chocolate. If you do it will be too thick to dip anything. The trick is to heat it on low (I used the microwave, you could use a double broiler) for 30 seconds at a time. Once they start to melt, do not keep re-heating, just stir until they are all dissolved using the residual heat from the other chips. This will keep the chocolate from seizing.

So that the sticks would stay better, I dipped the end of each stick in the candy before placing it in the ball of cake. You can see my set-up below. I set a small crock pot to warm and heated the candy melts in the pot, then after they were melted I put them in the pot so it would maintain the right consistency.

These immediately went back to the fridge. I took out two or three at a time so that they were not too soft to dip and they wouldn't fall off the stick. I almost lost one, but was able to save it before it completely broke up in the candy melt, ruining it! Also, be sure to cover all of the cake or the oil from the cake will separate and leak out of the uncovered areas (not pretty).

Each stick was then set into a piece of Styrofoam so that they were upright. After the block was filled, they went into the fridge to harden.

I then drizzled red candy melt over the top. You can also dip in sprinkles or decorate with more elaborate designs.

The last piece of advice is that as you dip the cake, bits will come off and as you get to the end of the candy melt, it will become more "pure" (that may also be because I used white melt and chocolate cake). I only made it through half of the balls before I ran out of candy melt.


The girls on my team thought they were great and wanted to know where I got them... haha!
Let me know how it goes if you decide to give it a try!